Tuesday, December 23, 2014

Lights for Christmas


I finished some Christmas lights just in the nick (St. Knick) of time.

Remember those old, old Christmas tree light strings? The kind that were so delicate and temperamental. If one light went out, the whole string went dark. To fix it you had to remove one light bulb at a time and replace it with one you knew was good. You would go from bulb to bulb and finally two bulbs from the last one the string lit up!

This was a tedious process. It was important to plug in the string and see that it lit up before you hung it on the tree. My father did this. After a few days of admiring the tree with its festive display, one string would go dark. To do the testing and replacing one had to crawl around and into the tree. It was worth it.

Today, I sewed up some 4.5" square Christmas lights quilt blocks that will never blink off.

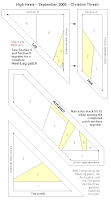
If you would like to make your own paper pieced Christmas lights, click on the graphic below and you will find a three-part foundation to print out. If you don't know how to paper piece, go to my Paper Piecing Primer http://www.winnowing.com/ppp.html

Here is a suggestion for fabric placement:
Merry Christmas.

Labels: , , , ,

Tuesday, December 24, 2013

Decorating finished

 I was a little late this year but I managed to finish my Christmas decorating. Whew!
This year the log cabin tree has ornaments! I designed this in 2009. If you want to whip one up before tomorrow, click HERE for the pattern.

My sons and grandsons visited me this week so I am feeling content and cozy. Now that I have the decorating done I can sit back and read with my new Kindle.

I'm also weaving a collar for a sweater to use in the forthcoming Knitters' Weaving Projects book.

Labels: , , , ,

Saturday, June 29, 2013

South Africa

Many people are thinking about Nelson Mandela and South Africa right now. I posted a free 4-inch paper pieced pattern of the flag in 2009. You can click on the photo below and go to the page if you would like to make one.

Labels: , , , ,

Saturday, June 22, 2013

Super Moon

We will all be able to see a "super moon" this weekend. It is especially beautiful where I live in the California Delta because it hangs over Mt. Diablo. I made a little paper pieced foundation in 2009 as my tribute to the moon over Diablo.
You can see the old post here. There are instructions for making the moon for applique, and the foundations for paper piecing.

Labels: , , , ,

Monday, June 03, 2013

My laundry today

Here is my laundry hanging to dry.
I just washed a bunch of 4-inch paper pieced blocks I made way back in July of 2009. They needed a good wash because the other day my cat, Feather, got locked in my sewing room all day. When I finally discovered him late at night he had been confined for at least 12 hours. He was very happy to get out and I thought all was well. NOT. My sewing room smelled very peculiar (that's putting it nicely). Today I searched and sniffed every pile of fabric in there. I found one small collection of blocks that the poor cat had decided to use as his temporary sandbox. Whew!

After this wash, I hope they will be as good as new. If you want to see some of the blocks, go to the July, 2009 archive here. I did a block-a-day series that year. There are free paper piecing foundations to print out, too.

Labels: , , , ,

Friday, April 29, 2011

William & Kate

In honor of the wedding in London today, I pulled out this old (sort of messy) paper pieced pattern for you to try. You can copy the pattern by clicking on the small graphic below and printing it out for your personal use. The four foundations are for the four quadrants of the flag. You will also need to rotary cut two 1 ¼ inch strips of red fabric. Use the strips as sashing between the quadrants for the final UK flag.

Labels: , ,

Tuesday, December 07, 2010

Important December tasks

The two most important tasks every December are putting up the Christmas tree and paying the property tax 1st installments. Well, the tree is up and the property taxes are paid.

Last year, I put up my pattern for making this little Log Cabin Christmas Tree. You can go to the pattern by clicking here. It’s not too late to make your own.

Happy December!

Labels: , ,

Tuesday, November 02, 2010

Voting today

Here in California we had several confusing propositions to sort through. Some seemed to contradict other ones. I marked my sample ballot at home and took it with me to the polls.

They don’t allow cameras at our voting place. I wonder why. I see photos of candidates voting at their polling places on the news.

I voted. I am planning to stay up late tonight to see the results.

Last September, I presented a paper pieced “Voting Block” pattern for your entertainment. I think it is okay to re-cycle it today. Click on the small block below and it will take you to the original, full size, 4-inch free pattern.

Labels: , , ,

Sunday, April 04, 2010

Quilted Easter egg

You can make an Easter egg with your own quilt or block. It’s fun. Go to http://www.dumpr.net/ and pick out the egg shape. Upload a photo of a quilt or block and they will make it into a decorated egg for free.

I used my Sun Rays block from last September. You can use it for your egg if you want to. Click here.
Happy Easter to you.

Labels: , , ,

Thursday, December 24, 2009

Log cabin Christmas tree

This little log cabin Christmas tree went on the table today. It is 10 inches tall.

If you want to make this little paper pieced tree, click on the small graphic below to print out your own foundations. You will need three foundations. Set your printer margins to ¼ inch all around so it will print out full size. If your printer will not accept such small margins just print out whatever size you can, but remember to add full ¼ inch seam allowances around the foundation sides.

Construct the three sides of the tree on their separate foundations. Fold up the bottom ¼ inch seam allowances before you sew the three sides together.

Trim the point and narrow the seam allowances near the top before you turn the tree right side out. I used a knitting needle to push up the point.

Merry Christmas to all.

Labels: , ,

Sunday, December 13, 2009

Patchwork tree ornaments

These two little patchwork ornaments are for two of our neighbors with dogs. Neighbor Mary has a rescued Cocker Spaniel named Sam. Neighbor “S” has a Chow dog.

You might be inspired to make some little tree ornaments featuring a friend’s pet or hobby. If you have some novelty fabric you can use a small piece for the center triangle. I had fabric with lots of dogs on it.

The patchwork trees would make good gift tags if you make the center triangle white and use Pigma Micron pens to write the names. (My daughter-in-law gave me some cute fabric gift tags which inspired me.)

You can click on the small graphic (below) for a full size paper piecing foundation to print out for your own personal use. There is a template for the backing fabric, too.

Construct your tree ornament on its foundation. Remove the foundation paper. Make a fabric backing for the ornament in a contrasting fabric. Fold up the bottom ¼ inch seam allowance and press it firmly down. (It is easier to turn the bottom fold before you sew the tree and the backing fabric together.)
Put the tree and the backing fabric right sides together and sew up one side, pivot at the point, and sew back down the other side. Do not sew across the bottom of the tree because you need an opening to turn the ornament right side out.

Clip the corners and narrow the seam near the top point. Turn the ornament right side out. I used a knitting needle to try and poke the top point up. Iron the ornament flat. Sew across the bottom with a blind stitch. I used gold embroidery floss to make a hanging cord at the top.
These little patchwork tree ornaments are pretty darn small. I suggest you enlarge the pattern on your copier to make these easier to turn right side out.

Labels: , , , ,

Thursday, November 19, 2009

A fixture in our house

Vicky said, "How about a toilet next? Not to unplug....to paper piece!"

Okay, Vicky. Here is a foundation for a 4-inch paper pieced fixture. Click on the little graphic below so you can print the foundation for your own personal use.

Now, I am going to get out of the bathroom and start on something new.

Labels: , , ,

Sunday, November 15, 2009

That sink-ing feeling

Life has been pretty dull around here. There has been nothing to blog about.

Our big project this week was cleaning out our bathroom sink drain. It took three days. We poured vinegar and baking soda in and then used various things to poke into the overflow area. We got some chemical called CLR (calcium, lime, rust) and poured that in. We got a bottle brush thing and Robert used that too. A lot of plunger work and suddenly it started to flow again. Whoopee!

Now I have to get busy with Brasso and shine up the faucets.

I made a block to celebrate this momentous occasion. It is called Old Sink.

If you would like to make a 4-inch paper pieced pedestal sink block, click on the small graphic below and print out you own copy of the foundation for personal use.


Let’s hope something more interesting happens tomorrow to inspire a new block-a-day. (I have not made one since my sandal block on October 16.)

Labels: , , ,

Friday, October 16, 2009

Put a sock in it

Continuing with my shoe series, I decided to do a 4-inch paper pieced sandal block. But it is too darn cold to wear sandals now. I’ve been known to wear socks with sandals in the winter. I swear the sandal-sock combination keeps my feet warmer than wearing boots.

My favorite textile teacher, Lydia Van Gelder, was well known for wearing wild hand-knitted socks with sandals. I guess I am emulating her.

If you want to make a 4-inch paper pieced sandal block, click on the graphic below for two foundations to print out for your personal use. You can put a bare foot in your sandal and save it for next spring.

Labels: , , , ,

Friday, October 09, 2009

Let's get to work

There are nurses in our family.

The first one I know about was my grandmother Mabel Tracy. She graduated from nursing school in 1903. Robert’s aunt, Peg, was a nurse in the early 1960s and worked in Herrick’s emergency room in Berkeley. Peg went on to become a flying nurse in Alaska. Peg met Patsy at Herrick and we all adopted Patsy as an honorary cousin way back then. Peg’s daughter Lucy followed her mother’s footsteps and became a registered nurse, too. Catherine is our second cousin and she graduated from nursing school a few years ago.

I’m paying tribute to all the amazing nurses I know by doing a Nurse Shoe block-of-the-day.

If you would like to make a 4-inch paper pieced working shoe to honor some hardworking friend, click on the small graphic below. You will find foundations to print out for your own personal use.
Another person I see regularly is Wayne the UPS driver. He wears shorts all year round with beige socks, and he brings fabric and other goodies to my house. He is on his feet all day. So, here’s a 4-inch block for Wayne and other busy people.

Wayne’s shoe block is just the reverse of the nurse shoe. Click on the graphic below and it will take you to foundations to print out for a right-facing work shoe.

Labels: , , , , , ,

Tuesday, October 06, 2009

Every girl needs...

… red cowgirl boots.

I had the hat, the holster, the gun, the vest, and the fringed skirt. I was sure I had boots, too. But looking at the old photo below, I guess I was wrong. I remember my boots. They must have come along later.

I remember the day they had to cut one boot off my foot. I was at Jody Gompertz' house swinging on a huge swing that went out over a precipice. For some inexplicable reason I let go and fell into the canyon. Jody’s father was a doctor and when they carried me up to the house he had to cut the boot down one side to get it off my swollen foot.

If you need boots, you can make some 4-inch paper pieced ones. Click on the small graphic below and you will find foundations for making some. You can print out the foundations for your own personal use.

These boots are so much easier to make than the high heel shoes (and they are more comfortable). I posted this free pattern, called Baby Boots, on my patterns site back in 2000.

Labels: , , , ,

Sunday, October 04, 2009

Goodie two shoes

I’m saying “goodie” because these two high heel shoe blocks are finished. They were not easy to do.

The gold shoe is the same 4-inch basic high heel shoe pattern, but I left out the leg and foot areas.

The lizard shoe was inspired because I have some lizard print fabric. I saw a picture of Michelle Obama wearing Jimmy Choo heels during her visit to the UK in April of this year. The actual Choo shoes are not real lizard skin, but are embossed patent leather. I reversed the high heel foundations pattern and left off the strap for a different look.

I improved the foundation pattern a little bit from the one I posted on September 29, 2009. So, if you wish to make some high heel shoes, click on the small graphic below and you will find the foundations to print out for your personal use.


I’m going to do an easy shoe for next time. High heels are tiring on the feet and in the sewing machine.

Labels: , , ,

Tuesday, September 29, 2009

Red shoes

Today is the 70th anniversary of the Wizard of Oz movie. I’ve been thinking about shoes lately. The two shoes I put up on my blog – cleats, and the walking shoe – have led readers to suggest I do a series of shoes. So, without further ado, here is my block-of-the-day for today:
I have some ideas for variations on this theme. I’ll be working on them in the next few days. Have you read Manolo’s Shoe Blog? I learned about it on Terry Grant’s blog and I pop in every so often to see the shoes. I am a sneaker kind of gal and don’t even own a pair of high heels anymore. I do have a pair of Finn Comfort black suede wedge shoes for “good.”
In the meantime, you can increase your shoe wardrobe by making a 4-inch paper pieced high heel shoe (perhaps a pair). Click on the small graphic below and it will take you to some foundations to print out for your own personal use. This is a kind of tricky pattern. I didn’t find it very easy to do, but I will improve with practice.

Labels: , , , , ,

Friday, September 25, 2009

A football great

… grandson, that is. Joey is on the Phantoms team in Sonoma County. He is a running back. In his second game this season he ran a 60 yard touchdown. Way to go!

To celebrate this achievement I made a 4-inch football cleats block.

I was going to put a Swoosh on the side of the shoe, but I learned a bit about trademark restrictions by visiting this informative site: Duets Blog. If you make this little block for your football player you can add the Swoosh, but I dare not put it on my pattern (project).

I can show you a close-up of Joey’s cleats.

You can make this 4-inch paper pieced football cleats block. If you have football fans in your family this would make a splendid cornerstone block for a quilt. Click on the small graphic below to find a three-part foundation to print out for your own personal use.

If this block looks somewhat familiar, it is because I did a walking shoe block (no cleats) for my block-a-day July calendar.

Labels: , , , , ,